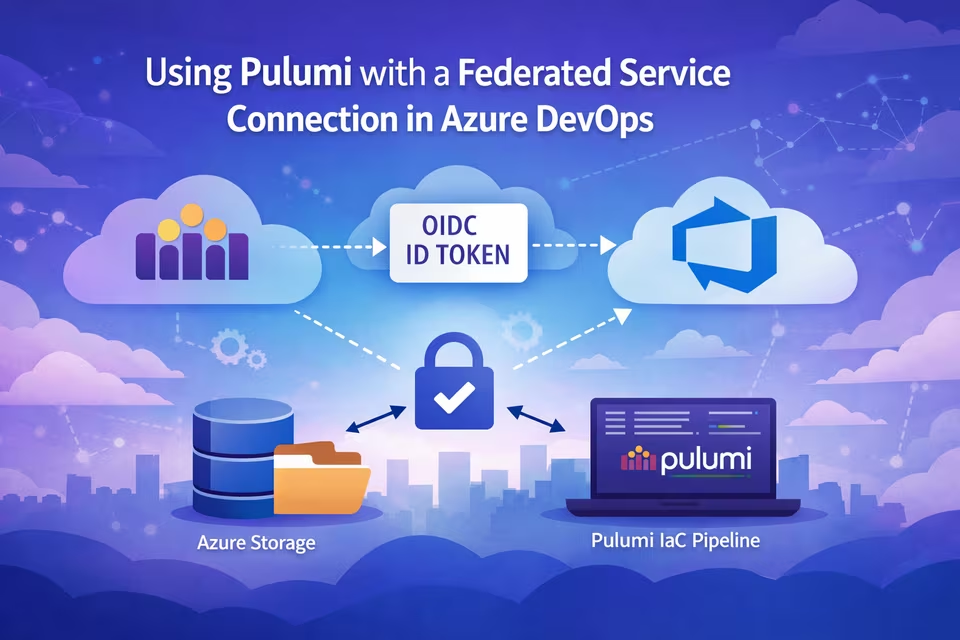
In this guide, we’ll configure Pulumi to authenticate to an Azure Storage Account using an Azure DevOps (ADO) federated service connection with OpenID Connect (OIDC).
By the end, you will have:
- An App Registration in Entra ID
- A federated Azure Resource Manager service connection in Azure DevOps
- An Azure Storage Account backend for Pulumi state
- A pipeline configured to authenticate using OIDC
ADO introduced federated connections to Azure back in September 2023 and avoids long-lived secrets or needing to deal with secret rotation and follows modern Azure authentication best practices. You no longer have to create a separate service principal since the app reg functions as one.
Pulumi lets us use our own custom backend solutions, including Azure Storage Accounts. Normally, when using an SA, we can simply rely on the credentials provided by az login. However, if you're using a federated service connection in ADO to connect to Azure, Pulumi requires a bit of extra setup.
If you already have a federated service connection in ADO, you can skip down to here.
Create the App Registration
Azure DevOps can create an app registration automatically, but it will generate a name like [Organization]-[SubscriptionId]. I prefer creating it manually so I can control naming. If that doesn't bother you, you can skip this step.
We first need an App Registration in Entra ID. This application represents Azure DevOps when authenticating to Azure.
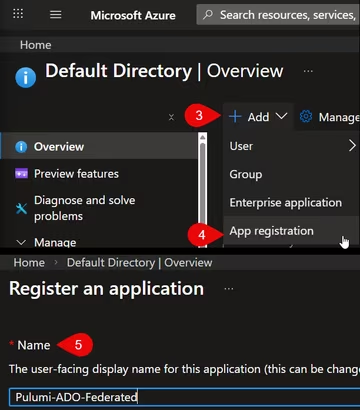
- Navigate to the Azure Portal
- Open Microsoft Entra ID
- Select App registrations
- Click New registration
- Provide a name (e.g.,
Pulumi-ADO-Federated) - Leave the defaults and create the app
Create the Storage Account Backend
Pulumi supports multiple backends. Instead of Pulumi Cloud, we’ll use Azure Storage.
Because we’re using a self-managed backend, we must create this storage account manually before Pulumi can manage infrastructure. The name of the storage account and container can be named however you'd like. For this example, I'm using state as the container name.
- Create a new Storage Account in your desired resource group
- Configure networking and firewall rules appropriately
- Do not leave it open to public access
- At minimum, restrict it to Microsoft network access
- Add your IP if testing locally
- Create a container named
state.
Pulumi will store its state files here.
Create the Federated Service Connection in Azure DevOps
Now we configure Azure DevOps to use workload identity federation.
From your Azure DevOps project:
- Go to Project Settings
- Select Service connections
- Click New service connection
- Choose Azure Resource Manager
From here, the flow will depend on if you created an app registration manually or if you want ADO to create one.
If you didn't create the app registration manually, you just need to populate the Subscription and the Service Connection Name fields, and ADO will create an app reg for you.
Otherwise, select App registration (manual) as the identity type.
On Step 1, populate:
- Service Connection Name
- Tenant ID (from Entra ID or the App Registration overview)
On Step 2, populate
- Application (client) ID (from the App Registration overview)
- Subscription ID and name
- Scope level (typically Subscription)
Configure the Federated Credential
Now switch back to the App Registration.
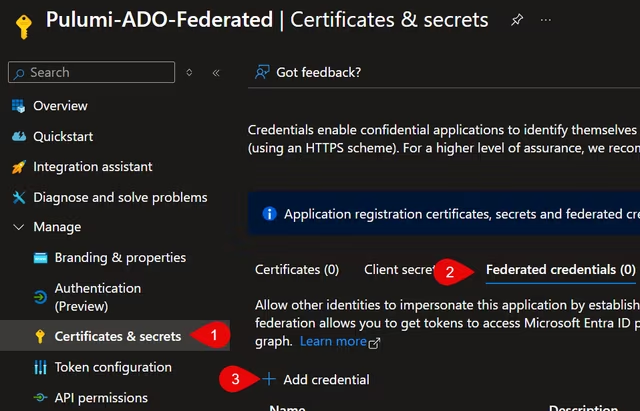
- Go to Certificates & secrets
- Select Federated credentials
- Click Add credential
- Choose Other issuer
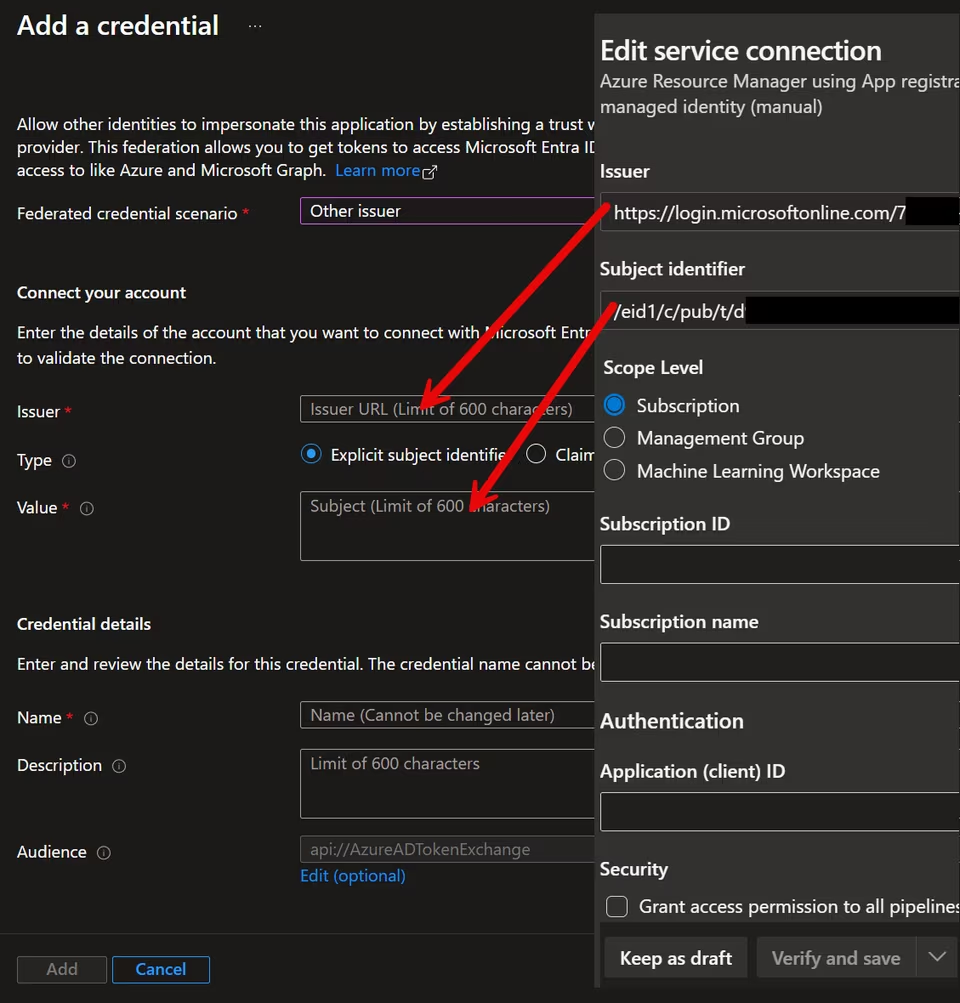
From Azure DevOps, copy and paste:
- Issuer → Azure Issuer field
- Subject identifier → Azure Value field
Give the credential a name and click Add.
Return to Azure DevOps and click Verify and save.
Your federated service connection is now ready.
Grant Azure RBAC Permissions
This application registration needs permissions to deploy resources and access state.
For this example, I assigned:
- Contributor at the subscription scope to allow Pulumi to deploy resources
- Storage Blob Data Contributor and Storage Blob Data Reader to the storage account to write and read to the state files
You may want to decide if Contributor at the subscription level is right for your use case. Be sure to explore least privilege and scope access appropriately.
Configure the Pipeline for OIDC
To use OIDC in a pipeline, you must expose the service principal details.
In YAML:
- task: AzureCLI@2
  inputs:
    azureSubscription: Pulumi-ADO-Federated
    scriptType: pscore
    scriptLocation: inlineScript
    addSpnToEnvironment: true
    inlineScript: |
    # PowerShell script here
The critical setting is: addSpnToEnvironment: true.
This exposes servicePrincipalId , tenantId and idToken through the environment variables
We must also enable OIDC explicitly by setting ARM_USE_OIDC=true
Connecting Pulumi to Azure Storage
Below is the PowerShell script used in the Azure CLI task:
# Set this to the same value when you created the Pulumi project.
$env:PULUMI_CONFIG_PASSPHRASE = ""

# Enable OIDC authentication
$env:ARM_USE_OIDC  = "true"
$env:ARM_OIDC_TOKEN = $env:idToken
$env:ARM_CLIENT_ID = $env:servicePrincipalId
$env:ARM_TENANT_ID = $env:tenantId

# Required for azblob backend
$env:AZURE_STORAGE_ACCOUNT = "[yourStorageAccountName]"

pulumi login azblob://state
At this point:
- Azure DevOps provides the OIDC token
- Azure validates it against the federated credential
- Pulumi authenticates using that identity
- State is stored in the `state` container
No secrets are stored in the pipeline. Test that pulumi login works in your pipeline.
Final Thoughts
Pulumi is a great IaC tool, and I love that I can write my resource code in the language of my choice in real programming languages instead of domain-specific languages like Bicep or Terraform.
Using an Azure Storage Account is a great way to have complete control over your state files and offers the ability to place your organization's security controls around it.