Authenticating Blazor application with Azure B2C
We’ve looked at setting up an Azure B2C tenant in previous posts, now let's see how we can put it into practice within our Blazor applications.
B2C is a great way to provide authentication and authorization to your users. It delegates most of the security considerations to Azure AD, making it one less thing you need to worry about.
The Web application is significantly easier to showcase, as will be the trend when I post about B2C/Blazor authentication. If you’re using Visual Studio, you can add most of the requirements with a simple right click. VS will prompt you for a B2C tenant and application and then set up your app config and nuget packages.
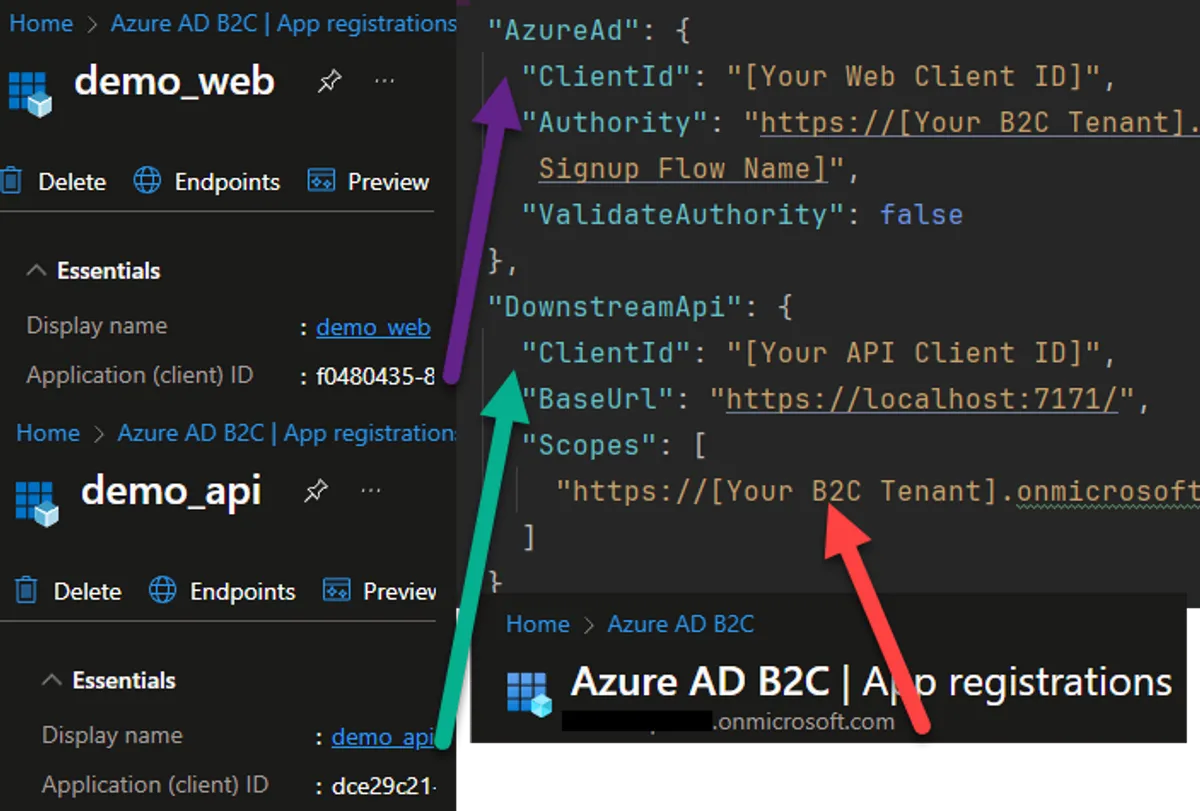
In each project, we need some kind of settings store that can hold the information about the Azure B2C tenant and our downstream API details. I’ll cover more about how the downstream API works in the next post.
Note: Take special care to make sure you only include details in these configs you expect to be public knowledge. If you deploy the Blazor Web project as a static website, then the appsettings.json file can be transmitted to the user’s browser. Likewise, the native apps will be on the user’s device. I have some CI/CD tricks to swap an environment-specific configuration during deployment for the web project.
Take a look at this appsettings.json file.
{
  "AzureAd": {
    "ClientId": "[Your Web Client ID]",
    "Authority": "https://[Your B2C Tenant].b2clogin.com/[Your B2C Tenant].onmicrosoft.com/[Your B2C Tenant Signup Flow Name]",
    "ValidateAuthority": false
  },
  "DownstreamApi": {
    "ClientId": "[Your API Client ID]",
    "BaseUrl": "https://localhost:7171/",
    "Scopes": [
      "https://[Your B2C Tenant].onmicrosoft.com/api/[Your API Scope]"
    ]
  }
}
It's pretty simple. The Azure AD section defines our current application with a client ID. The authority property is a URI with the B2C tenant name and our sign-up flow name.
The Downstream API section defines the API’s information. The client ID and scopes here come from the app registration we set up in the B2C tenant. The base URL is where the endpoints we want to call are available.

If you have questions on where to find this information, check out my previous post where I covered creating the tenant. I also have a video walkthrough.
The process is nearly identical for the native apps, with a bit more details about the B2C tenant.
Adding B2C authentication to the web project is pretty easy. In the main program file, we just need to add the service like so:
builder.Services.AddMsalAuthentication(options =>

        {
            builder.Configuration.Bind("AzureAd", options.ProviderOptions.Authentication);
            options.ProviderOptions.DefaultAccessTokenScopes.Add("https://graph.microsoft.com/User.Read");
            options.ProviderOptions.DefaultAccessTokenScopes.Add("openid");
            options.ProviderOptions.DefaultAccessTokenScopes.Add("offline_access");
            options.ProviderOptions.AdditionalScopesToConsent.Add(downstreamApiConfiguration.ClientId!);
            options.ProviderOptions.LoginMode = "Redirect";
        });
The Microsoft.Authentication.WebAssembly.Msal nuget package handles all the heavy lifting.
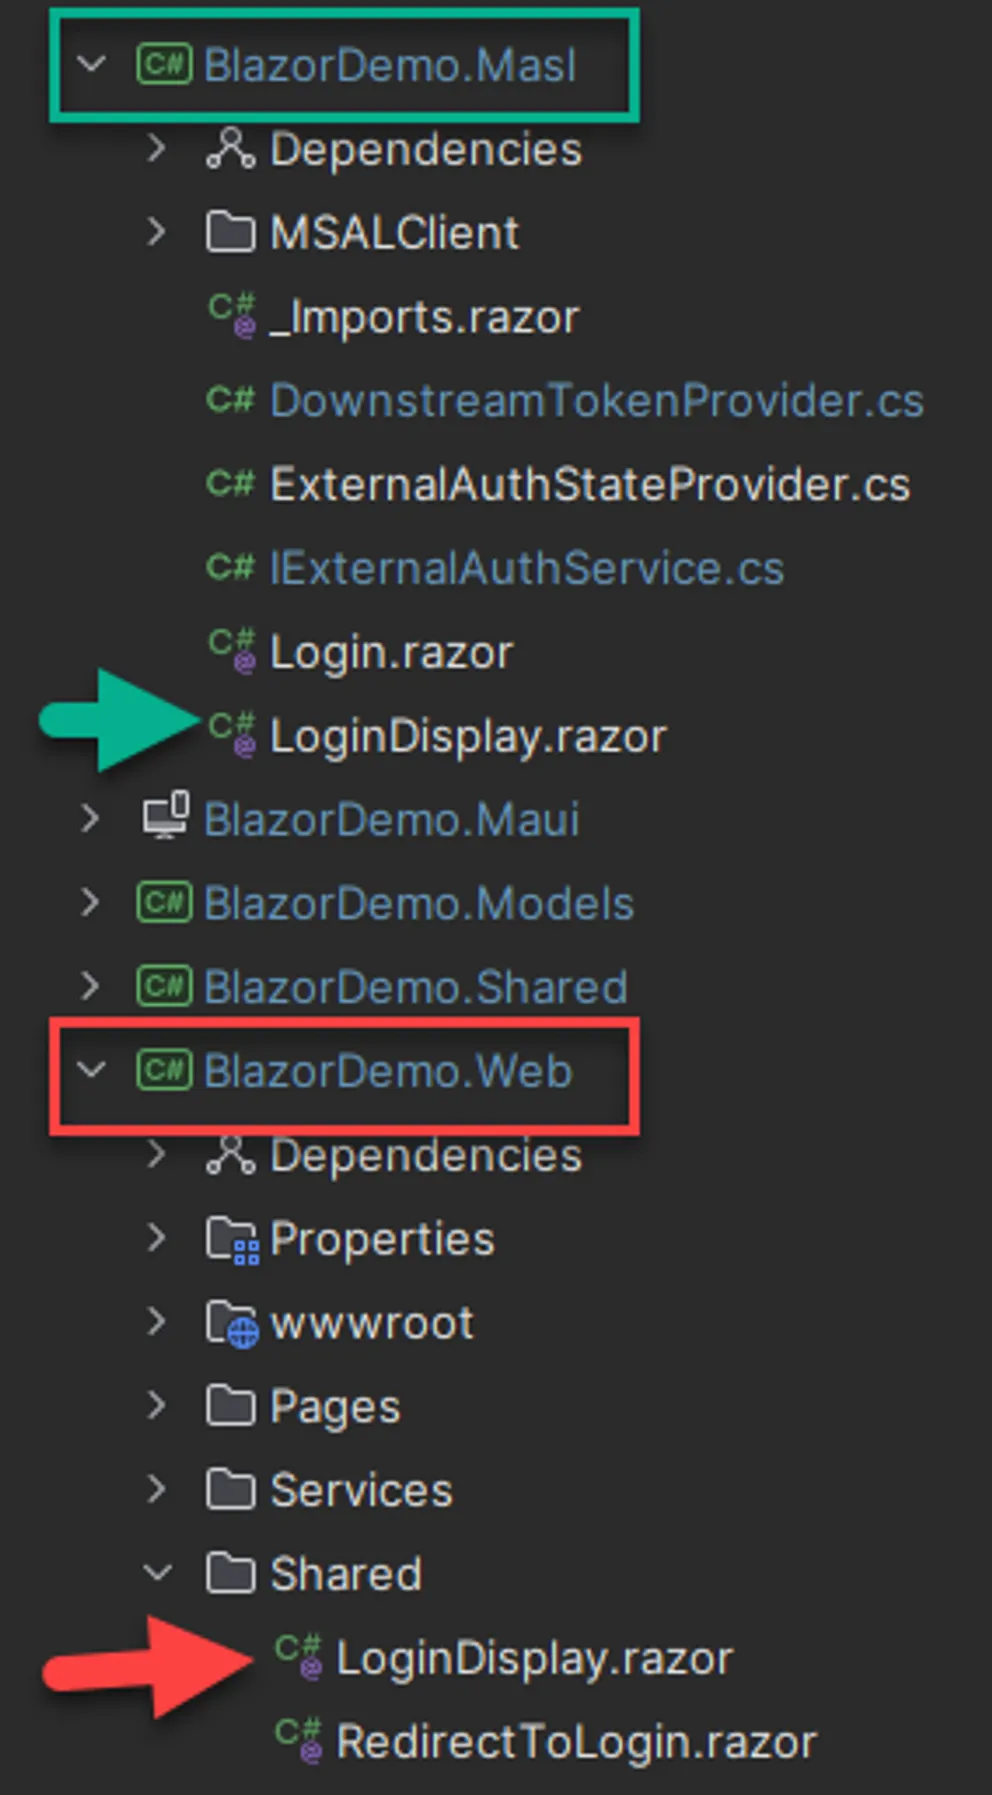
Unfortunately, the native apps require a lot of extra work. I had to find MSAL code and piece it all together. Due to the amount of code that’s mostly just the boring client code, I won’t cover it in depth here. For the native apps, I had to create a token provider, and an auth service and an authentication state provider in addition to the client code, to replicate things that were missing. Hopefully, as Maui matures, Microsoft will make this part easier. I probably should see if there’s more code that could be consolidated between the three projects, but for now, it works.
Because the process of logging in to the web project is different from the native apps, I wanted a way that I could continue to share as much code between the different projects while providing the same flexibility you get with a DI container but for view components. This led me to creating a custom Loader component that takes a name of a component and a dictionary of parameters.
//Loader.razor
<DynamicComponent Type="@_componentType" Parameters="@Parameters" />

@code {
    [Inject]
    private IJSRuntime Js { get; set; } = default!;

    private Type _componentType = typeof(EmptyLoader);

    [Parameter]
    public string? ComponentName { get; set; }

    [Parameter]
    public IDictionary<string, object> Parameters { get; set; } = new Dictionary<string, object>();

    protected override void OnInitialized()
    {
        if (ComponentName == null) return;

        var componentType = AppDomain.CurrentDomain
            .GetAssemblies()
            .Where(x => x.FullName != null && x.FullName.Contains(nameof(BlazorDemo)))
            .SelectMany(x => x.GetTypes())
            .Where(x => x.FullName != null && x.FullName.Contains(nameof(BlazorDemo)))
            .FirstOrDefault(x => x.FullName!.Contains(ComponentName));

        if (componentType != null)
        {
            _componentType = componentType;
        }
    }

}
This component searches the loaded assemblies for a matching name within our own assemblies, and then applies the parameters to it if it’s found. That means the Web project can have a component located within its own assembly or the Shared project. Likewise, the native apps can do the same. A caveat to this is that, since it’s just using a component name as a filter, it’s possible that if there is more than one component with the same name it might choose the wrong one. A more complex way of identifying components might be in order, but this works well enough for the demo.

From the MainLayout.razor, we use the loader component to find a suitable LoginDisplay component to render. Which project is running will determine which component we get.
//MainLayout.razor
<ul class="navbar-nav  justify-content-end">
  <Loader ComponentName="LoginDisplay"></Loader>
</ul>
In both of the login display components, we have a display for the currently logged-in user (if there is one) and a login/out action.
The web project will use the built-in MSAL library to redirect the user to the B2C user flow. The native apps will attempt to get a login token silently or, if that fails, interactively. The interactive flow will open the user’s default browser to the B2C user flow.
After the user logs in or registers, B2C will redirect the user back to the app or prompt to close the window, and we will have a token and authenticated user ready to use.
I hope that is helpful to you in your B2C authentication journey. As always, please feel free to reach out if you have questions or corrections. I’d love to hear from you!