Unlocking Azure Key Vault Secret Deployment
I'm going to give you the keys to unlock the secret of how to use Azure Key Vault in your Azure App Services configuration.
I was working on an Azure Function App that needed a client ID and secret to access an API, and the question came up as to how and where to store the client secret in a secure, redeployable manner.
There are three main ways that you could use a secret in your app.
The Bad
The bad way is to put it directly in your code.
var luggageCombo = "1234"
In some scenarios that might not be terrible, like in the case of a sandbox or a public key, but in most cases you don't want to do this. It's easy for a developer to get access to, and if their PC or local code was compromised in some way, your secret might become be very public.
The Ugly
You could put the secret directly in the App Settings in the portal.

This option is less bad since it at least keeps it out of the code base and provides RBAC support that could prevent people without the proper permissions from viewing or modifying the value. However, it's not repeatable in your deployments and still not very secret. If you have multiple environments, or the secret changes, then you have to repeat the whole process for each environment.
The Good
A better option would be to store the secret in an Azure Key Vault.

This way the secret is actually secure and RBAC can take care of preventing undeserving eyes from seeing it (at least until it's retrieved for use). The downside is this is still not repeatable. If you have multiple subscriptions or environments, any changes must be copied over or risk having an application failure.
The Best
We can do several things to improve the process.
- Deploy the Key Vault and App with an ARM/Bicep template via a pipeline.
- Add our secret as a secret value to either a Library/Variable group or to a pipeline variable as a secret type.
- Deploy the secret value through an Azure CLI PowerShell task along with permissions to our app.
- Set our app configuration to use a Key Vault reference.
- Use the config in our app.
Depending on your current setup, you might be able to simply deploy a single bicep file and do all 5 steps in one go. This was not an option for me at the time. Let's look at each step in more detail.
1. Deploying the Initial Templates
Here is our bare-bones service plan, web app and key vault on the free tier. Note that the Key Vault gets a Service Principal object ID from the parameters. We need to grant the pipeline the ability to create a new key. We will actually create the key itself later on.
//this is the service principal of our DevOps <-> Azure connector
param adoConnectorServicePrincipal string
//if no app name parameter is give, generate a unique repeatable string
param webAppName string = uniqueString(resourceGroup().id)
//if no location is give then us the resource group's
param location string = resourceGroup().location
//we can create the plan, site and key vault name based on the app name.
var appServicePlanName = toLower('AppServicePlan-${webAppName}')
var webSiteName = toLower('wapp-${webAppName}')
var kvName = toLower('kv-${webAppName}')

resource appServicePlan_resource 'Microsoft.Web/serverfarms@2021-03-01' = {
  name: appServicePlanName
  location: location
  sku: {
    name: 'F1'
  }
  properties: {
    reserved: true //required for the service plan to be Linux.
  }
}

resource appService_resource 'Microsoft.Web/sites@2021-03-01' = {
  name: webSiteName
  location: location
  properties: {
    serverFarmId: appServicePlan_resource.id
    siteConfig: {
      linuxFxVersion: 'DOTNETCORE|6.0' //if using Windows, this is DOTNET|6.0
    }
  }
  identity: {
    type:'SystemAssigned' //this is important for accessing the KV later
  }
}

resource kv_resource 'Microsoft.KeyVault/vaults@2021-11-01-preview' = {
  name: kvName
  location: location
  properties: {
    tenantId: subscription().tenantId //get the tenant id from the current subscription
    accessPolicies: [
      {
        tenantId: subscription().tenantId
        objectId: adoConnectorServicePrincipal
        permissions: {
          secrets: [
            'Get'
            'List'
            'Set'
          ]
        }
      }
    ]
    sku: {
      family: 'A'
      name: 'standard'
    }
  }
}
We need to get the user running the pipeline and pass that user to the Bicep file. You can get the pipeline service principal by adding addSpnToEnvironment: true . I found that this ended up being the App ID from the Azure Devops <-> Azure connector and had to look up the service principal of that app with az ad sp show .
- task: AzureCLI@2
  displayName: 'Deploy Bicep template'
  inputs:
    addSpnToEnvironment: true
    azureSubscription: $(azureServiceConnection)
    scriptType: pscore
    scriptLocation: inlineScript
    inlineScript: |
      $appId = az ad sp show --id $env:servicePrincipalId --query id
      az deployment group create --resource-group $(resourceGroupName) `
                                 --template-file $(templateFile) `
                                  --parameters webAppName="$(appName)" `
                                     adoConnectorServicePrincipal="$appId"
I love Bicep 💪. It's so much easier to read and use compared to ARM templates. The resourceGroupName and templateFile references above can either be string literals or from pipeline variables that we'll see shortly.
2. Putting the secret somewhere
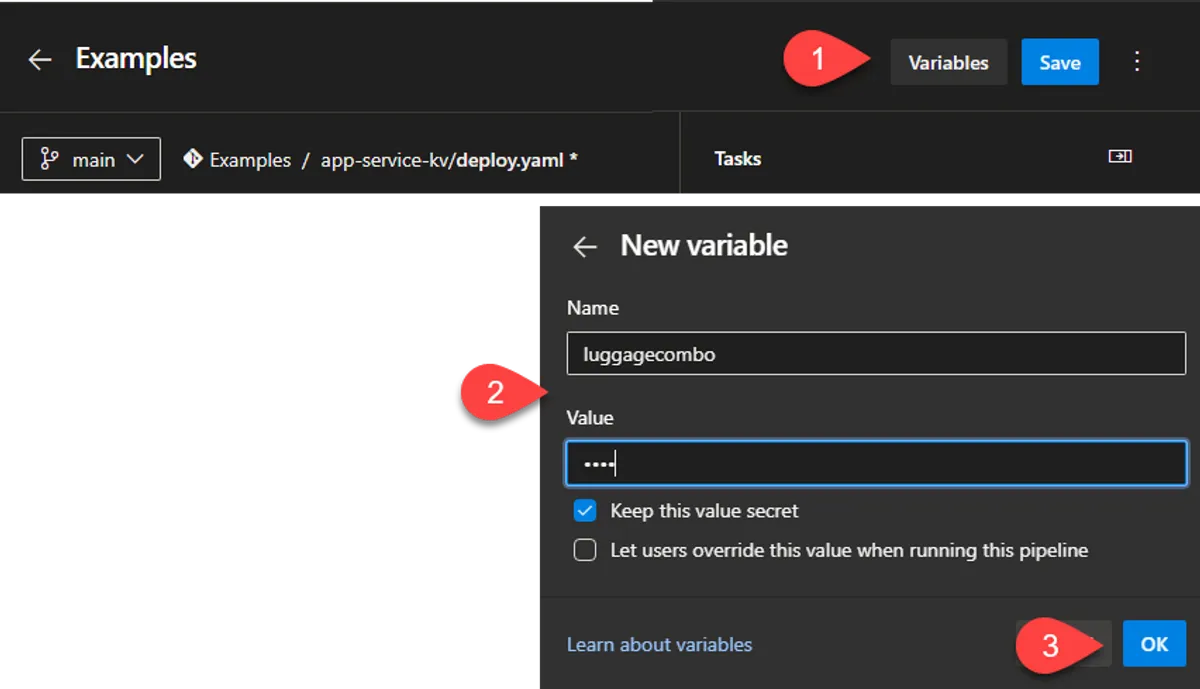
I've created a YAML deploy pipeline in Azure DevOps and from there added a variable to the pipeline. You could do this in the classic pipeline editor. You can also store this value in a Library/Variable Group.

The important part of step 2 above is to click "Keep this value secret".
Storing the value here doesn't provide any change tracking. You can actually pull values from a Key Vault directly in a pipeline or in Bicep. This still ends up being a chicken and egg problem. How do the values end up in Key Vault?
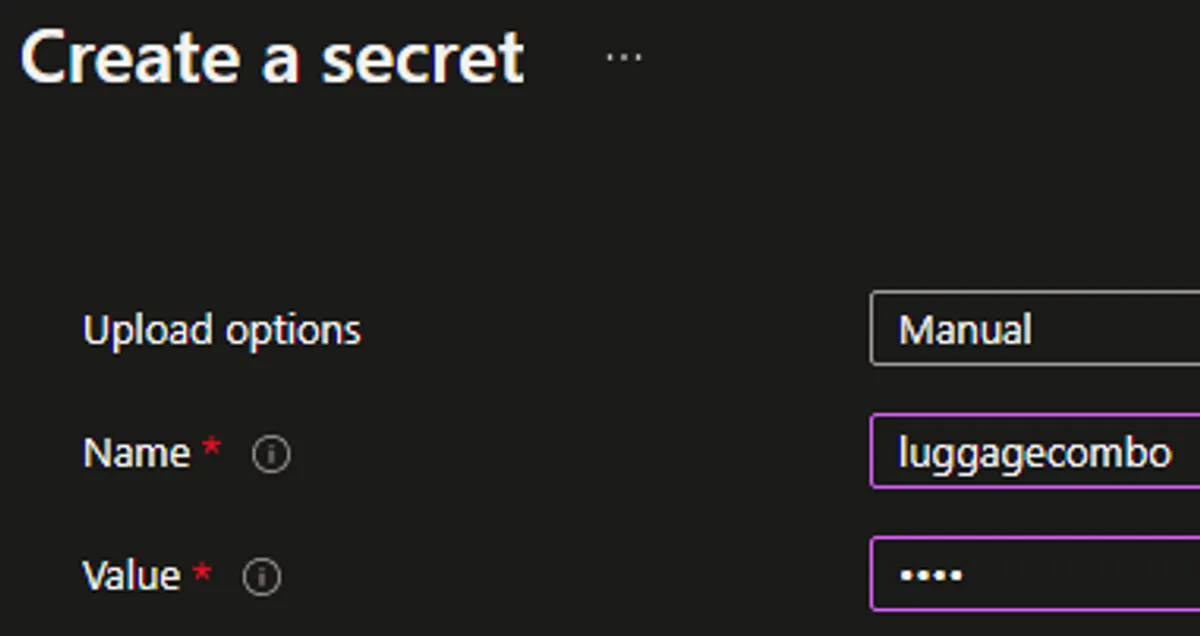
3. Deploying the secret to Key Vault
In our pipeline, we will add a step to take the pipeline variable secret value and deploy it to the Key Vault.
- task: AzureCLI@2
  displayName: 'Update Key Vault Secret'
  inputs:
    azureSubscription: $(azureServiceConnection)
    scriptType: pscore
    scriptLocation: inlineScript
    inlineScript: |
      $kvName = 'kv-$(webAppName)'

      # set the secret value
      az keyvault secret set --vault-name "$kvName" --name clientSecret --value "$env:luggagecombo"
  env:
    luggagecombo: $(luggagecombo)
You might have spotted the luggagecombo: $(luggagecombo) bit at the bottom. This is a bit of black magic that keeps the value secret. If you use $(luggagecombo) directly, it will be visible in the logs.
4. Using the Key Vault Secret Reference
Next, we add our Web App's principal ID to the Key Vault access policies so that the app can make use of it.
- task: AzureCLI@2
  displayName: 'Update Key Vault Policy'
  inputs:
    azureSubscription: $(azureServiceConnection)
    scriptType: pscore
    scriptLocation: inlineScript
    inlineScript: |
      $kvName = 'kv-$(webAppName)'
      # Get the principal id from the deployed app
      $principalId = (az webapp identity show --name "wapp-$(webAppName)" --resource-group "$(resourceGroupName)" --query principalId)

      # add a policy to all the func to access the key vault secrets
      az keyvault set-policy -n "$kvName" --secret-permissions get list --object-id $principalId
During the initial deployment of our web app or as a pipeline task, we want to set up an app setting to use our new Key Vault secret.
resource webSiteConfig 'Microsoft.Web/sites/config@2021-03-01' = {
  name: 'web'
  parent: appService_resource
  properties: {
    appSettings: [
      {
       name: 'clientSecret'
       value: '@Microsoft.KeyVault(VaultName=${kvName};SecretName=luggagecombo)'
      }
    ]
  }
}
5. Using the config
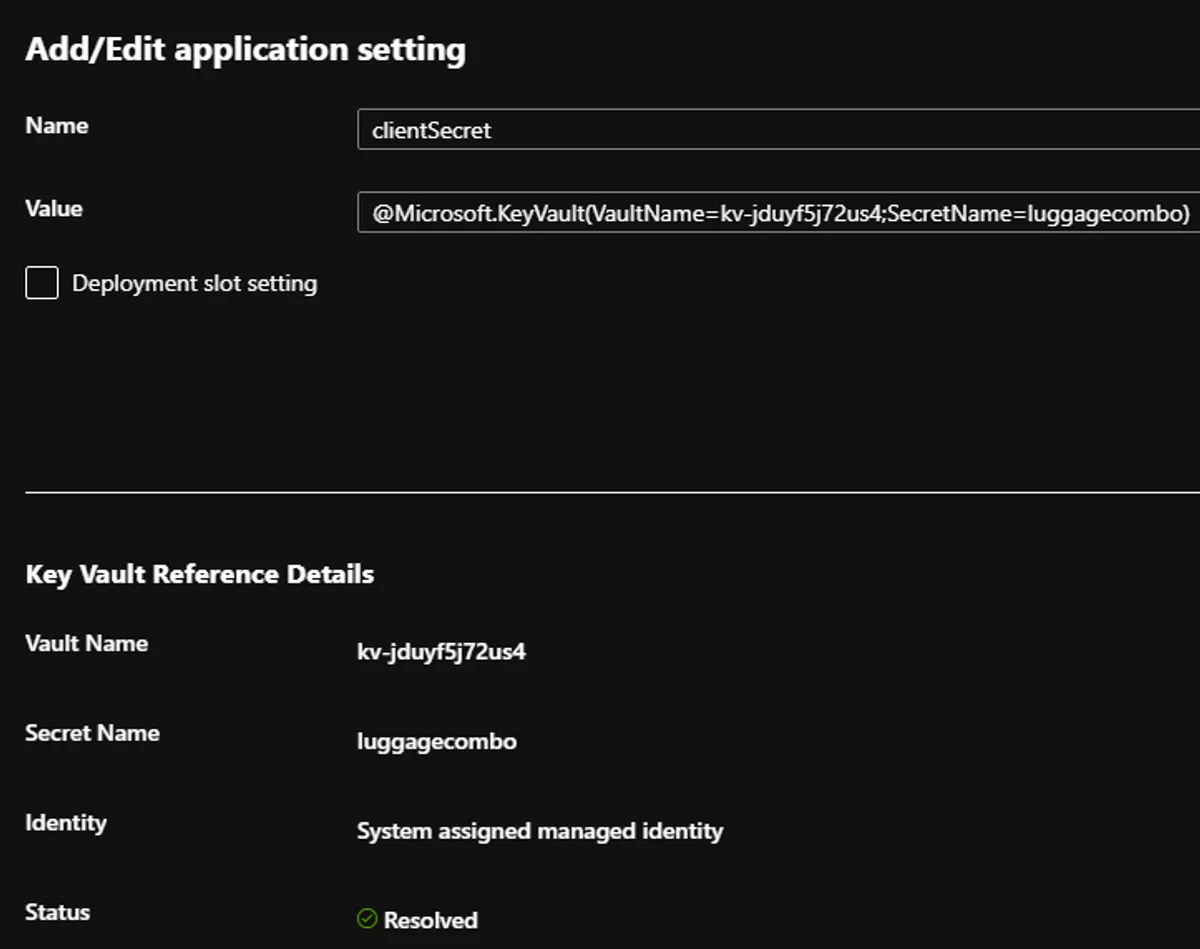
Here's what this looks like in the portal.

This Uri lets the app utilize our secret value as if the value is directly in the app configuration.
var secret = Environment.GetEnvironmentVariable("clientSecret");Parting thoughts
It's a bit amusing that I went through all this effort. If I could have started with Bicep from the beginning, I could have had a single template and a single deploy statement. Both the deploy.yaml and the complete Bicep file will be on my GitHub .
I hope that helps you on your Azure journey with something you're working on. Maybe I introduced you to some Bicep concepts, or you needed to know how to use Azure Key Vault values in your app configuration, or I guided you on how to push secrets to Key Vault.
Let me know in the comments!